The PIA client software is intended to run in the background. The PIA VPN connection is condensed to an interface that can be accessed from the System Tray Icon, as shown in the image below. If you do not see the icon in the tray, you may need to expand the tray by clicking the ^ on the taskbar.

Once the application is installed from our download page, you will need to input your login credentials received in the email used when creating your account. These include your username, in the format of ‘p1234567’ and the password you have been provided, or what you have changed it to since.

Now, your Private Internet Access credentials are saved in the application. The image shown below is the DEFAULT DISPLAY. This will be the primary window you use when interacting with the application day to day. In the image shown below, the connection button shows as yellow. This means you are not connected.

To establish a connection you will need to use the main button — it may take some time to establish the connection, this is normal.

If you are unable to connect, please reference the following guide to troubleshoot connectivity issues: “I have Trouble connecting or the Connection drops frequently: Changing Ports”
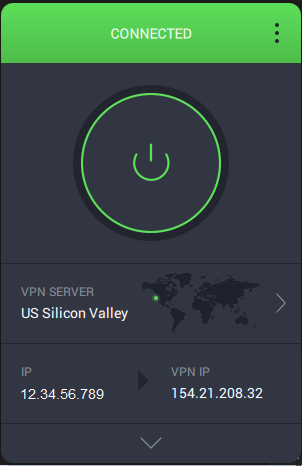
Once the connection is established, the connect button will change and the application will list your masked IP.

Now that you have established a VPN connection, you may want to run a few tests in order to confirm that there is nothing within your configuration that is compromising the security of the VPN. Private Internet Access provides the following three leak tests, with the piaX indicating that you are connected, you can visit the following three pages to confirm the security of your system.
IPv4 Leak Test: https://www.privateinternetaccess.com/pages/whats-my-ip/
IPv6 Leak Test: http://ipv6leak.com/
DNS Leak Test: http://dnsleak.com/
If your system reports a leak, please contact customer support with a detailed support request here: https://www.privateinternetaccess.com/helpdesk/new-ticket

